[migrated from Textlocal] How do I send texts (SMS) with Webex Interact?
You should already have migrated your Textlocal account to Webex (Option 1 in instructions here)
-
After you receive an email from notifications@textlocal.com that "Your Upgrade is Complete" —
Sign into your Webex account
-
Verify your account with your phone number and business details (see the banner notice at the top of your account for verifying)
- Otherwise you will see an error message of "Account Limit Reached" or "Your Account is Pending Verification"
-
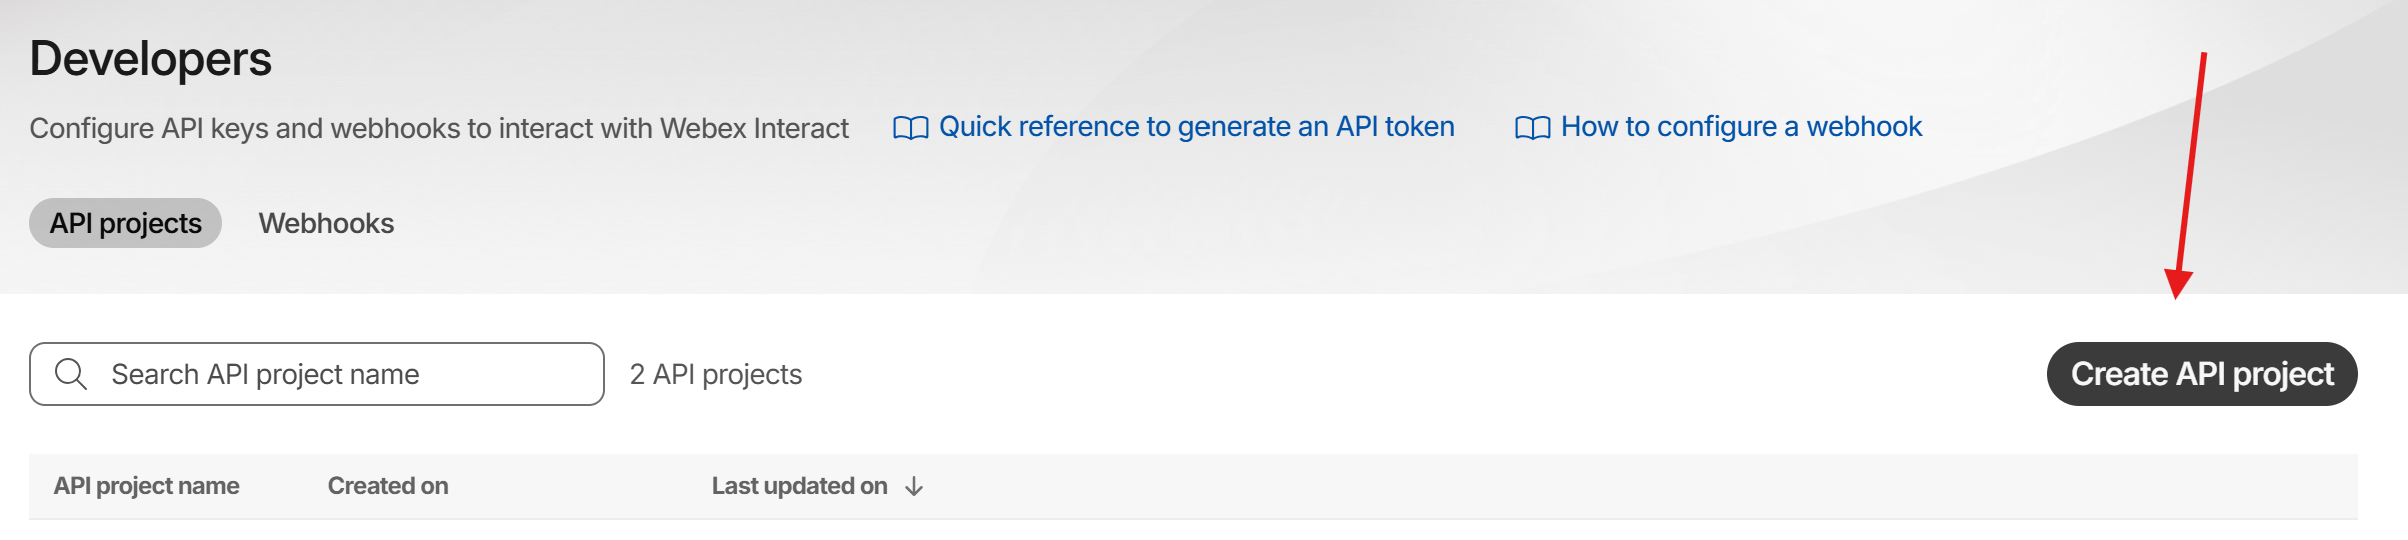
Click on the "Developers" tab
- Click "Create API Project"
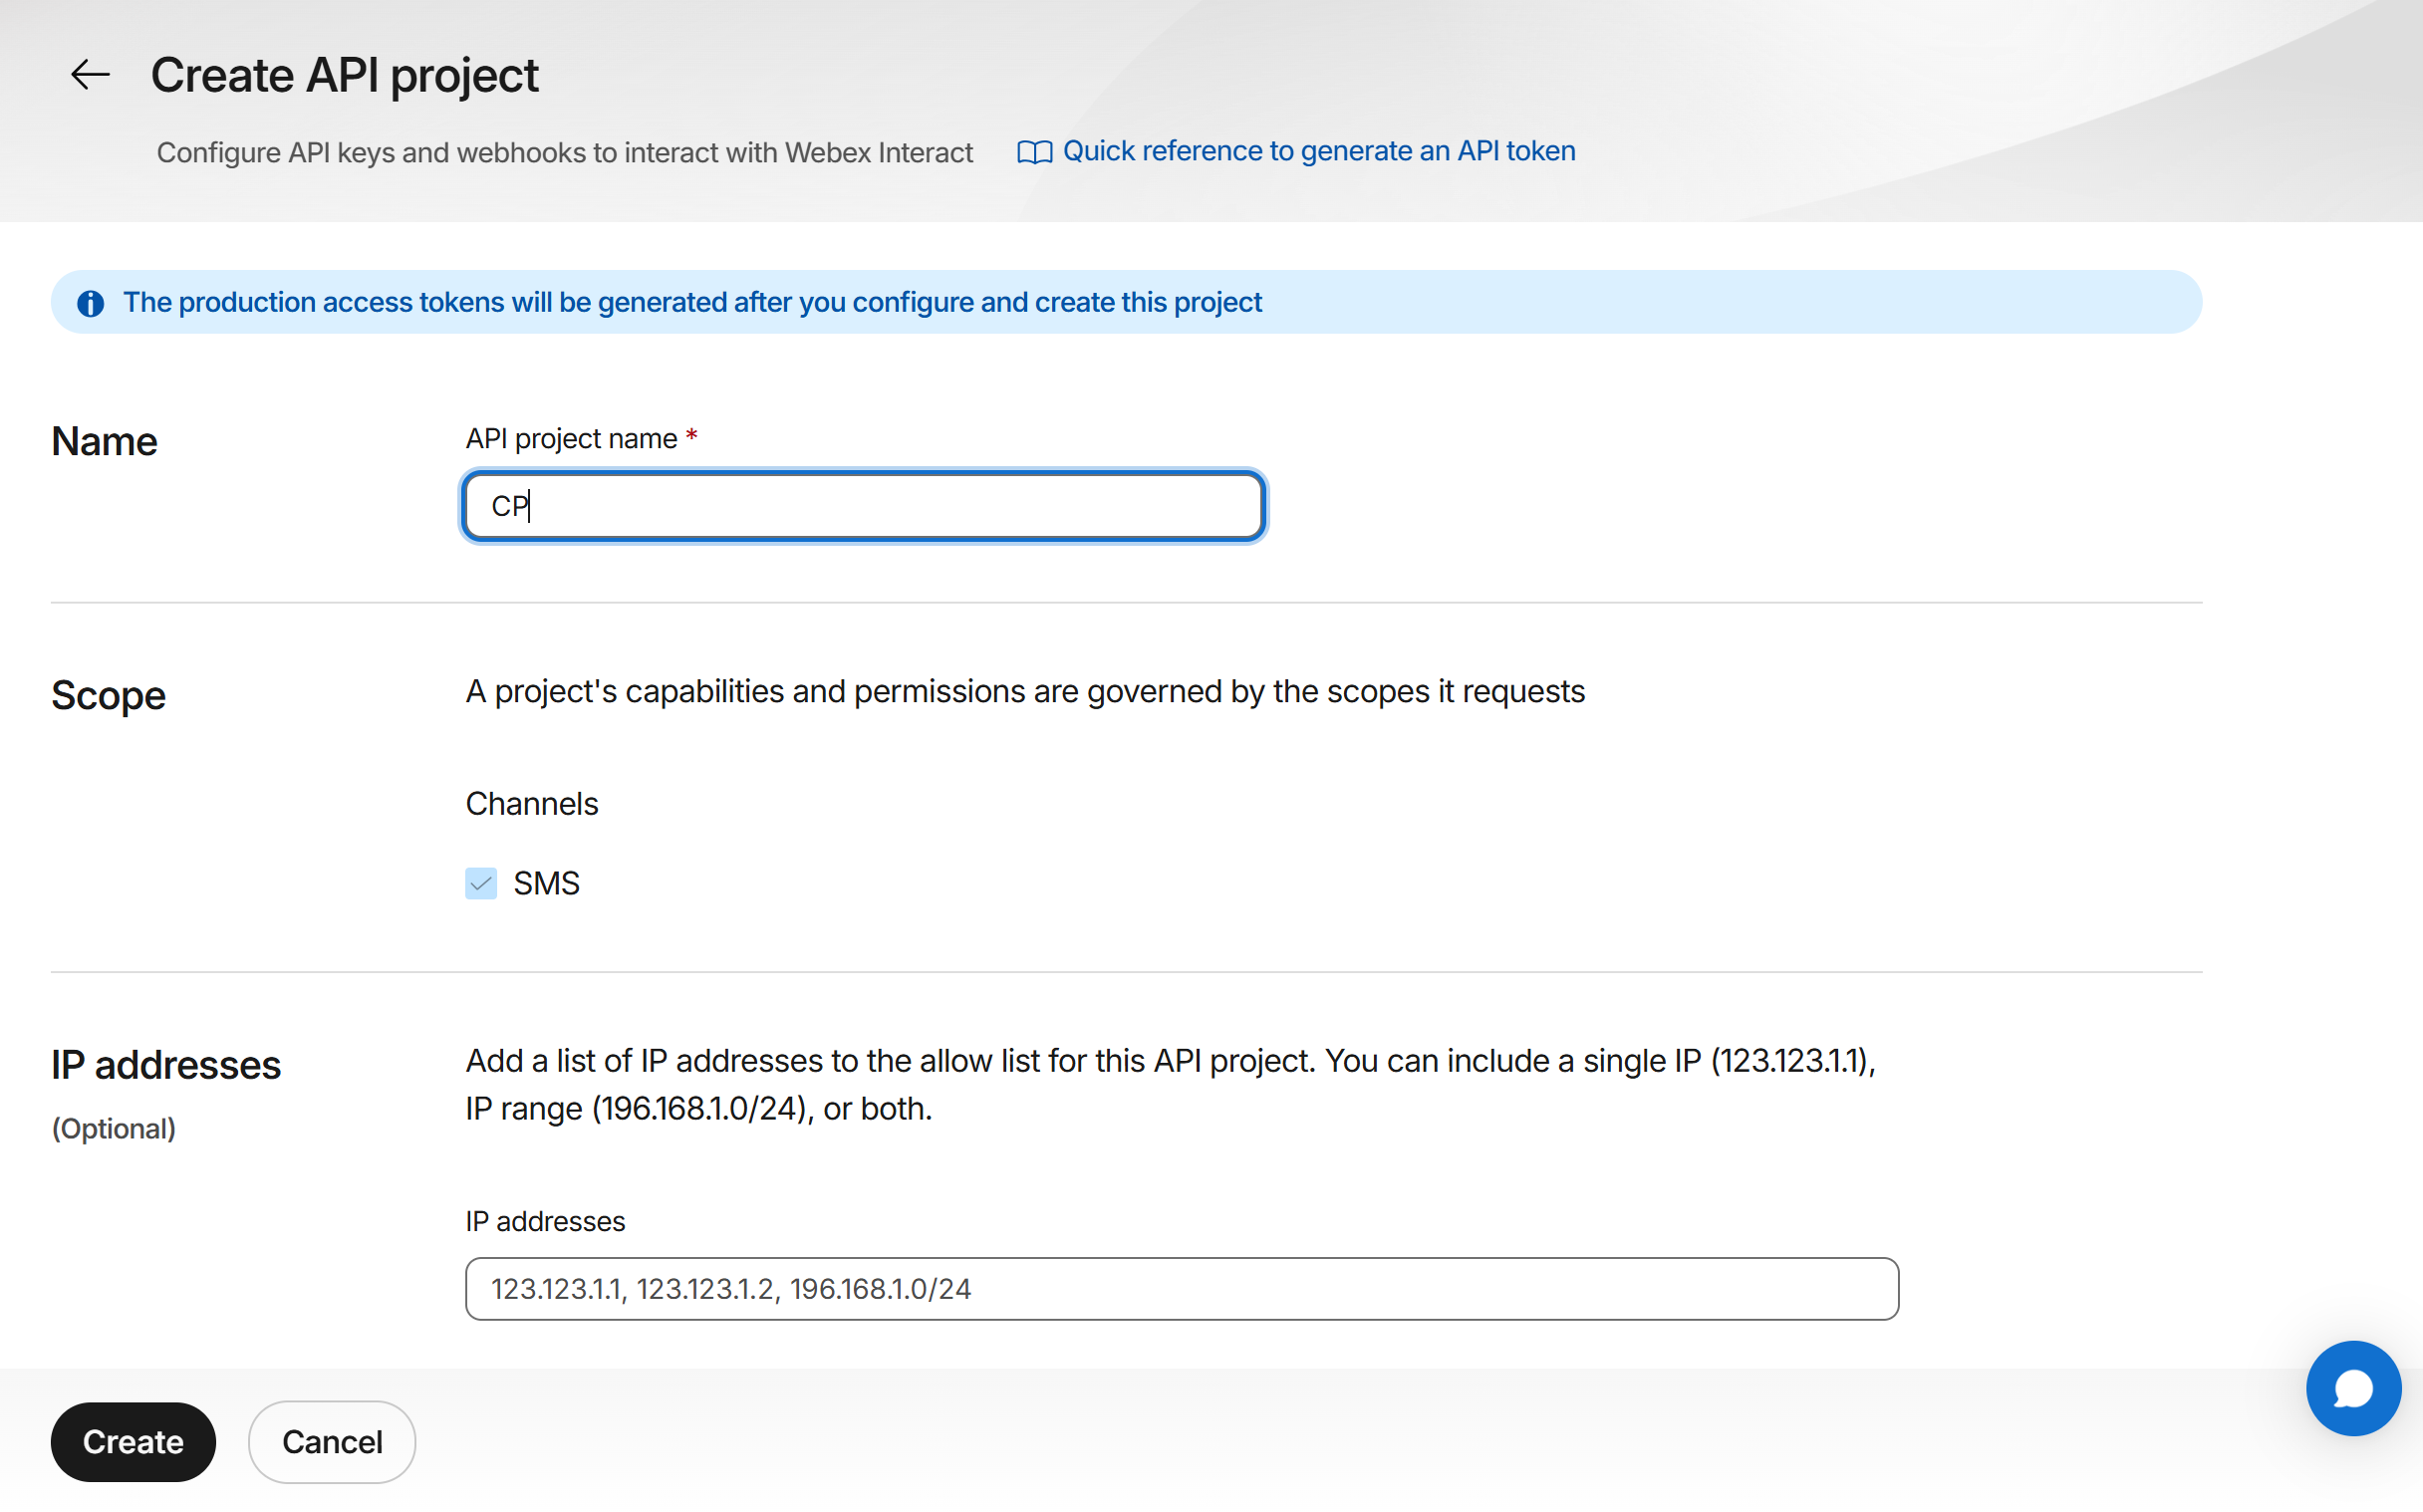
- Fill in any name such as "CP" or "CleanerPlanner" > click "Create"
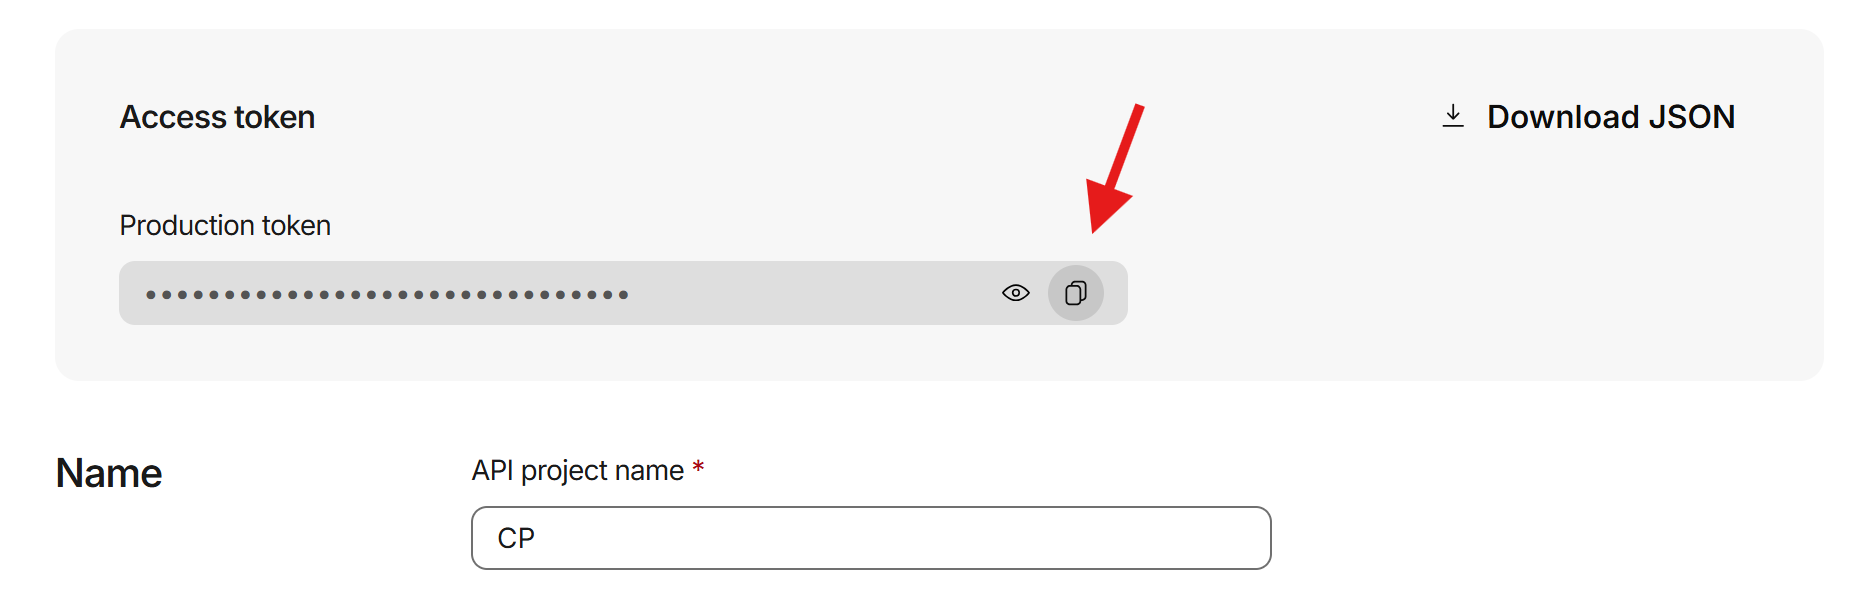
- Click on the clipboard icon to copy the Access token:
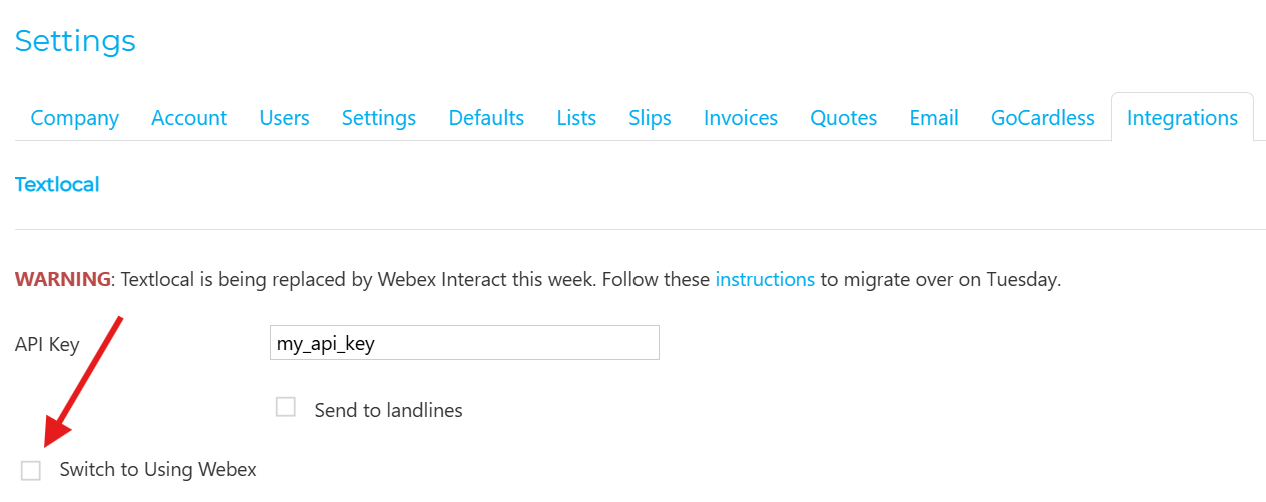
- Go to your CleanerPlanner account > Settings toolbar > Integrations
-
Check the box for "Switch to Using Webex"
-
Paste the Webex Access Token from step #6 into CleanerPlanner settings
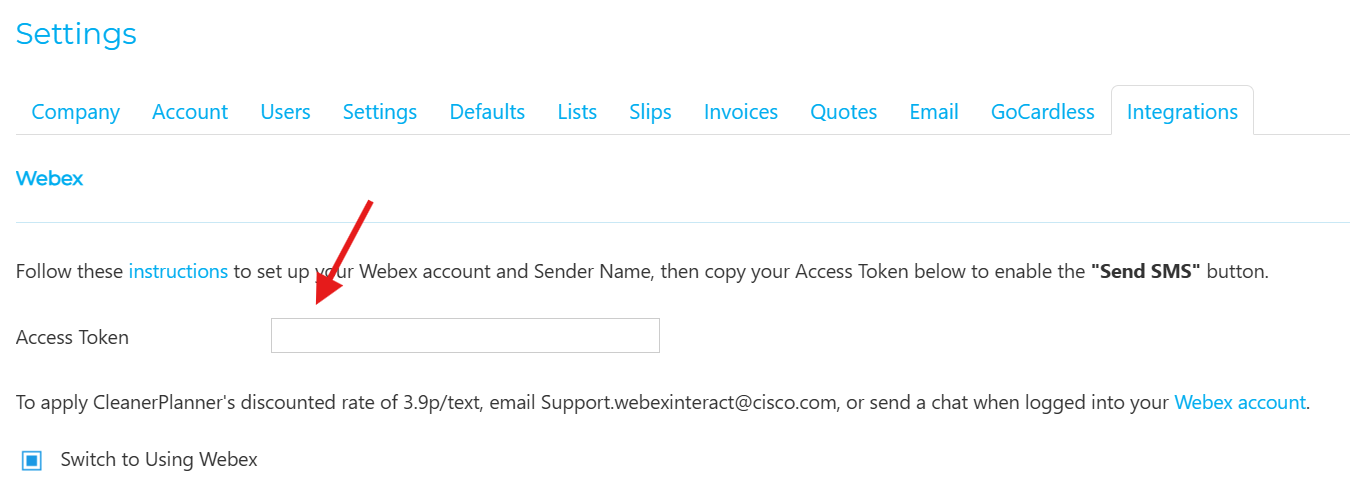


- Click "Save Settings"
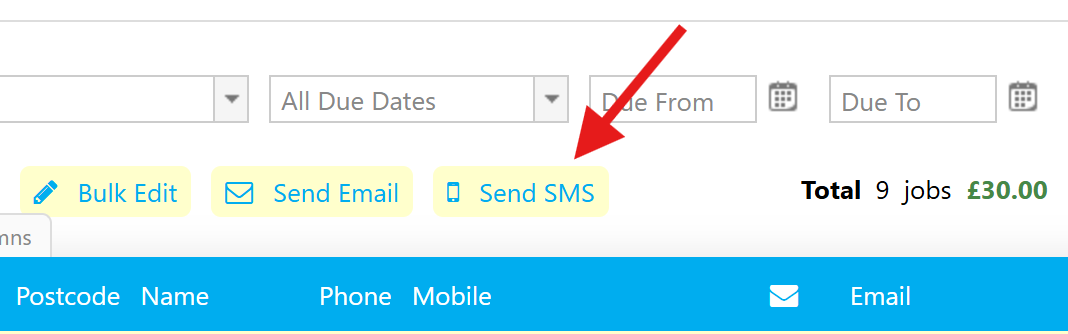
That's it! Now you can send SMS messages directly in CleanerPlanner:
-
Go to the "Jobs" tab > select some jobs > click "Send SMS" button
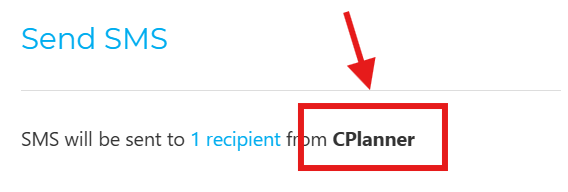
- NOTE: In the window that pops up, check what your "Sender Name" is i.e. your company name or mobile — this controls whether you can get replies from your customer (learn more here)
- If you have a mobile SenderName, make sure it starts with "447" (not "07") (learn more here)
-
- You can do the same on the "Rounds", "Planner", "Debts", and "Worksheet" tab
- You can set up recurring Reminders for your jobs (instructions here)


You can see your text message history in Webex under API reports and in Outbound History.
You can add funds manually or automatically in Webex here.
- The SMS rate remains the same between the two platforms (CleanerPlanner has a discounted rate of 3.9p/text). This should already have been automatically applied when you migrated your Textlocal account over to Webex